There is something inherently captivating about the sight of a clear glass jar filled with water, holding a single green cutting that is slowly but surely transforming into a brand new plant. This process, known as water propagation, is perhaps the most accessible and rewarding gateway into the world of indoor gardening. It offers a literal window into the biological wonders of nature, allowing us to witness the exact moment a plant decides to survive, adapt, and grow. While many people view it as a simple “set it and forget it” task, the reality is that successful water propagation is a delicate dance of chemistry, biology, and environmental management.
To master the art of growing plants in jars, one must first understand the fundamental drive of a plant to reproduce. Unlike animals, plants possess an incredible ability to regenerate entire organ systems from just a few cells. When you take a cutting, you are not just cutting a piece of a plant; you are initiating a survival sequence. The plant recognizes it has been severed from its life support system and immediately begins to redirect its hormonal energy to create new roots. This is where the magic happens, and providing the right aquatic environment is what determines whether that cutting becomes a thriving new addition to your home or a decaying memory in a glass of cloudy water.
The Biological Blueprint of Root Development
The science behind why a plant roots in water is centered around a group of hormones called auxins. These hormones are produced in the growing tips of the plant and are responsible for cell elongation and the formation of new roots. When a stem is cut, the flow of auxins is interrupted and begins to pool at the site of the wound. In a water environment, these hormones signal the specialized cells near the nodes to transform into root tissues. Nodes are those small bumps or junctions where leaves and branches meet the stem, and they are the most vital part of any cutting. Without a node, most plants simply cannot produce roots, no matter how long they sit in water.
However, the roots that grow in water are physiologically different from those that grow in soil. Water roots are often more fragile and possess a different cellular structure designed to pull oxygen directly from the liquid. This is an important distinction to make because it explains why some plants struggle when moved from water to soil later in life. The plant has essentially specialized its root system for an aquatic life. Understanding this biological pivot allows a gardener to be more patient and observant, recognizing that the plant is undergoing a massive internal reorganization during those first few weeks in the jar.
Choosing the Right Candidates for an Aquatic Life
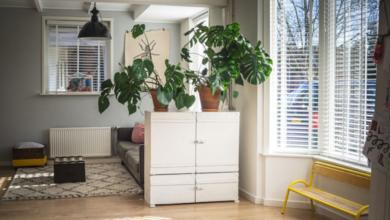
While the dream is to grow an entire jungle in jars, not every plant is suited for long-term water culture. Success starts with selecting species that have evolved in humid or semi-aquatic environments. The most common and successful candidates are members of the Aroid family. This includes the incredibly resilient Pothos, the elegant Heartleaf Philodendron, and the dramatic Monstera Deliciosa. These plants are naturally inclined to grow adventitious roots, which are roots that grow from non-root tissue like stems. This evolutionary trait makes them the undisputed champions of water propagation.
On the other hand, you have plants that are much more selective. Hardwood cuttings from outdoor shrubs or delicate succulents often struggle in water because their tissues are more prone to hypoxia, or a lack of oxygen. When these plants are submerged, their stems can quickly become waterlogged and begin to rot before the auxins have a chance to trigger root growth. For these more challenging species, the secret often lies in the quality of the water and the temperature of the environment. A warm, bright spot can speed up the metabolic rate of the cutting, giving it a better chance of rooting before decay sets in.
The Step by Step Mechanics of the Perfect Cutting
To ensure your propagation journey begins on the right foot, you must be surgical in your approach to taking a cutting. It is not enough to simply snap a piece off the parent plant. You need a clean, sharp, and sterilized tool. Using a blunt pair of kitchen scissors can crush the delicate vascular tissues of the stem, making it much harder for the plant to take up water and much easier for bacteria to enter the wound. A quick wipe with isopropyl alcohol on your blade is a small step that pays massive dividends in the health of your future plant.
When selecting your cutting, look for a healthy, vibrant vine or stem that is free of pests or disease. You want a piece that is roughly four to six inches long with at least two or three leaves at the top. The most critical part of the process is ensuring you have at least one or two nodes at the bottom of the cutting. You will need to strip away any leaves that would sit below the water line. Leaving leaves submerged is the number one cause of propagation failure, as the foliage will rot, deplete the oxygen in the water, and create a toxic environment for the emerging roots.
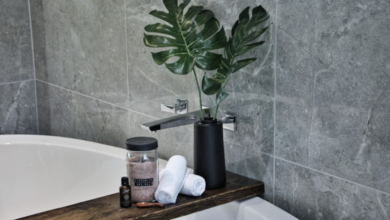
Vessel Selection and the Importance of Water Quality
The container you choose for your water propagation is more than just a decorative element; it serves as the nursery for your new plant. Clear glass is the most popular choice because it allows for easy monitoring of root growth and water levels. However, clear glass also invites light to interact with the water, which can lead to the growth of algae. While a little algae won’t necessarily kill your plant, it does compete for oxygen. If you find yourself struggling with green water, consider using amber or blue glass jars, which filter out some of the light while still allowing you to see what is happening inside.
Water quality is the silent factor that many beginners overlook. Most municipal tap water contains chlorine and fluoride to make it safe for human consumption, but these chemicals can be quite harsh on sensitive plant tissues. If you notice the tips of your cuttings turning brown or the roots looking stunted, your tap water might be the culprit. A simple fix is to let a pitcher of water sit out for twenty-four hours before using it, allowing the chlorine to evaporate. Alternatively, using filtered water or collected rainwater provides a much more natural and mineral-rich environment that more closely mimics the conditions a plant would find in the wild.
Maintaining the Ecosystem within the Jar
Once your cutting is placed in its jar and settled on a bright windowsill, the real work begins. Water propagation is not a static process; it is a living ecosystem that requires regular maintenance. The most important task is keeping the water fresh. Over time, the dissolved oxygen in the water is used up by the plant and by microscopic organisms. Without a fresh supply of oxygen, the environment becomes anaerobic, which is a breeding ground for rot and pathogens.
You should aim to change the water at least once a week, or more frequently if you notice it becoming cloudy. When you change the water, take the opportunity to gently rinse the stem of the cutting under a lukewarm tap. Sometimes a thin, slimy film called a biofilm will form on the submerged stem. This is a collection of bacteria that can eventually lead to rot. Gently wiping this away with your fingers ensures the stem can continue to “breathe” and absorb moisture. Additionally, keep an eye on the water level; evaporation can happen surprisingly fast, especially in the summer or in dry, heated homes during the winter.
Strategic Placement for Maximum Growth
Lighting is the engine that drives the propagation process. Your cutting needs energy to produce roots, and that energy comes from photosynthesis. However, there is a fine balance to strike. Placing a propagation jar in direct, intense sunlight can be a death sentence. The water can act as a lens, magnifying the sun’s rays and literally cooking the delicate tissues of the plant. Furthermore, high heat in a small jar leads to rapid bacterial growth and oxygen depletion.
The ideal location is a spot that receives bright, indirect light. A north or east-facing window is usually perfect, as it provides consistent, gentle light without the scorching heat of the afternoon sun. If you don’t have a suitable windowsill, you can use LED grow lights, keeping them at a safe distance to prevent heat stress. The goal is to provide enough light that the leaves remain vibrant and productive, but not so much that the environment becomes unstable.
Troubleshooting Common Propagation Hurdles
Even with the best care, you may encounter obstacles. The most common issue is the dreaded stem rot. If you notice the base of your cutting turning black, brown, or mushy, you must act immediately. This is usually caused by bacteria or a lack of oxygen. To save the plant, remove it from the water and cut away the rotted portion using a sterilized blade until you reach healthy, firm green tissue. Rinse the jar thoroughly with soap and water, and start over with fresh, filtered water.
Another common problem is “stalled” growth, where a cutting looks healthy but refuses to put out roots for weeks or even months. This can be caused by a lack of warmth or light. Some gardeners use a heat mat designed for seedlings to gently warm the bottom of the jar, which can significantly speed up the hormonal response. Another trick is to place a “rooting buddy” in the jar. Plants like Pothos produce an abundance of rooting hormones; if you place a Pothos cutting in a jar with a more stubborn plant, the hormones released by the Pothos can actually help the other plant root faster.
The Long Term Transition and Hydroculture
As your cutting develops a robust root system, you will eventually face a choice: move it to soil or keep it in water. If you choose to transition to soil, the best time to do so is when the roots are about two to three inches long. Waiting too long can make the transition harder, as the roots become too specialized for water. When you do pot it up, keep the soil consistently moist for the first week or two to help the water roots adjust to the new texture and density of the potting mix.
If you decide to keep your plant in water permanently, you are entering the world of hydroculture. While plants can survive in water for a long time, they cannot live on water alone forever. Water lacks the essential nutrients-nitrogen, phosphorus, and potassium-that soil provides. To keep a long-term water plant healthy, you will need to add a specialized, highly diluted liquid fertilizer every few weeks. This ensures the plant has the building blocks it needs to produce new leaves and maintain its vibrant color.
Key Success Factors for Water Propagation
| Factor | Optimal Condition | Why It Matters |
|---|---|---|
| Water Type | Filtered or Rainwater | Prevents chemical burn and mineral buildup |
| Lighting | Bright, Indirect | Powers photosynthesis without overheating |
| Temperature | 70-80°F (21-27°C) | Increases metabolic rate and root signaling |
| Maintenance | Weekly Changes | Replenishes oxygen and removes bacteria |
In conclusion, growing plants in jars is a beautiful blend of art and science. It teaches us to appreciate the slow, steady rhythm of nature and gives us a sense of stewardship over the living things in our homes. By understanding the biological needs of your cuttings and providing a clean, stable environment, you can transform a simple glass jar into a thriving cradle of life. This practice not only expands your plant collection for free but also deepens your connection to the natural world, one root at a time.