Every indoor gardener eventually reaches a crossroads where their beloved greenery begins to outgrow its home. You might notice roots circling the drainage holes like frantic escapees, or perhaps the soil dries out so quickly that you feel like you are watering every few hours. This is the moment of the re-potting ritual. However, for many plant parents, this process is fraught with anxiety. The fear of transplant shock is real, as a healthy plant can quickly turn into a wilted, yellowing shadow of its former self if the transition is handled poorly. Understanding how to move a plant from one vessel to another without triggering a stress response is the hallmark of a truly skilled horticulturalist.
Transplant shock is not a single disease but rather a collection of physiological stresses that occur when a plant’s root system is disturbed. When you pull a plant from its pot, you are essentially performing surgery on its life support system. The fine, microscopic root hairs that do the heavy lifting of absorbing water and nutrients are incredibly delicate. Even a few minutes of exposure to dry air or a slight tear in the root structure can send signals of distress throughout the entire organism. To successfully re-pot without shock, we must approach the task with a deep respect for botanical biology and a commitment to maintaining a seamless environment.
The Science of Why Plants Feel Stress
To prevent shock, we must first understand what the plant is experiencing. In nature, plants rarely move. Their roots are anchored in a stable environment with consistent temperature and moisture. When we re-pot, we are subjecting them to a series of rapid changes. The first is the physical trauma of removal. If the roots are stuck to the sides of the terracotta or plastic, pulling them away causes micro-fractures in the root tissue. These wounds are entry points for pathogens and fungi, and they temporarily shut down the plant’s ability to hydrate itself.
The second major stressor is the change in soil chemistry and structure. Different potting mixes have different levels of porosity, acidity, and nutrient density. If you move a plant from an old, compacted peat-based soil into a fresh, airy orchid bark mix, the roots must suddenly adapt to a completely different oxygen and moisture profile. This adaptation takes energy, and if the plant is already struggling from physical damage, it may not have the resources to survive the transition. This is why the choice of soil and the timing of the move are the two most critical variables in the re-potting equation.
Timing is Everything: Reading the Botanical Calendar
One of the most common mistakes beginners make is re-potting at the wrong time of year. Plants, even those kept strictly indoors, follow a circadian and seasonal rhythm. During the spring and summer, plants are in their active growth phase. Their metabolic rate is high, and they are producing plenty of growth hormones like auxins and cytokinins. If you re-pot during this window, the plant has the internal momentum to repair root damage and colonize the new soil quickly.
Conversely, re-potting in the dead of winter is a risky gamble. Most indoor plants enter a semi-dormant state when light levels drop. Their growth slows, and their ability to repair tissue is significantly diminished. If you disturb the roots during this period, the plant may sit in its new pot for months without growing new roots, leaving it vulnerable to root rot because the stagnant soil stays wet for too long. Unless it is an absolute emergency, such as a smashed pot or severe pests, always wait for the first signs of spring growth before reaching for your trowel.
Preparation: Setting the Stage for Success
Preparation is the secret weapon against transplant shock. You should never decide to re-pot a plant on a whim and start pulling it out of the pot immediately. The process should actually begin forty-eight hours before the move. Start by giving your plant a deep, thorough watering. You want the plant to be fully hydrated, with its cells turgid and full of water. This creates a reservoir of strength that the plant can draw upon during the move. Moist roots are also much more flexible and less likely to snap than dry, brittle ones.
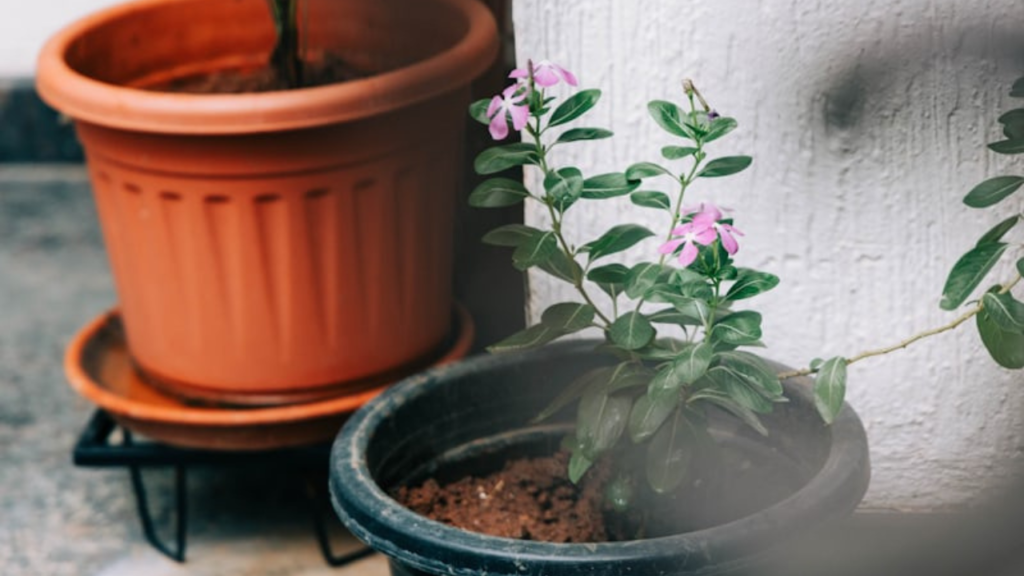
Furthermore, you must prepare your workstation and materials in advance. This includes choosing the right pot size. A common misconception is that a bigger pot is always better. In reality, moving a plant into a pot that is too large can be fatal. Excess soil that is not reached by roots stays wet for extended periods, leading to anaerobic conditions and rot. The rule of thumb is to only go up one size, usually two inches in diameter larger than the current pot. This provides enough room for a season of growth without overwhelming the plant’s ability to manage the moisture in the soil.
The Gentle Exit: How to Remove a Plant Safely
The moment of extraction is where most damage occurs. If you find that the plant is stubborn, do not pull it by the stem. This can cause the stem to separate from the root ball, which is almost always a terminal injury. Instead, turn the pot sideways and gently squeeze the sides if it is plastic. This loosens the grip of the soil on the container. If you are working with a ceramic or clay pot, you can use a long, thin knife or a spatula to run along the inside edge, much like loosening a cake from a tin.
Once the plant is out, resist the urge to vigorously shake the old soil away. Many guides suggest “teasing” the roots, but if the plant is healthy and not severely root-bound, it is often better to leave the majority of the root ball intact. The goal is minimal disturbance. If the roots are circling the bottom in a tight mass, you can gently loosen the very outer layer with your fingers, but avoid breaking the core of the root system. This ensures that the plant feels like it is simply expanding into a new room rather than being ripped from its home.
Soil Compatibility and the Importance of Drainage
The soil you use in the new pot should be as similar as possible to the old soil, or at least optimized for the specific species. If you are moving a cactus, you need a gritty, sand-heavy mix. If it is a tropical fern, you need something that retains moisture but still breathes. A major cause of post-repotting wilt is “perched water tables,” which occur when there is a significant difference in the texture between the old root ball and the new soil. If the new soil is much finer than the old, water may not move easily between the two, leaving the roots thirsty even if the new soil feels damp.
Drainage is non-negotiable. Every pot must have a hole at the bottom. Some people try to use a layer of rocks at the bottom of a hole-less pot, but science has shown this actually raises the water table and increases the risk of rot. To prevent shock, the roots need a constant supply of oxygen. Fresh potting soil is naturally airy, but it can become compacted if you press down too hard during the planting process. When filling the new pot, tap the container on the table to settle the soil rather than packing it down with your thumbs. This maintains those vital macropores that allow roots to breathe.
The Aftercare Phase: The First Two Weeks
What you do after the plant is in its new pot is just as important as the re-potting itself. Many people make the mistake of placing their newly re-potted plant in a sunny window to “cheer it up.” This is actually the worst thing you can do. Because the roots are temporarily less efficient at absorbing water, the plant cannot afford to lose moisture through its leaves via transpiration. Placing it in direct sun increases its metabolic demand at a time when its supply line is compromised.
Instead, place the plant in a spot with slightly lower light than it is used to for about a week. This allows the plant to rest and focus its energy on root repair rather than photosynthesis. Avoid fertilizing for at least a month. Most high-quality potting mixes come with a slow-release fertilizer already included, and adding more can burn the fresh, sensitive root tips that are trying to establish themselves. Fertilizer is a growth stimulant, and right now, your plant needs a recovery period, not a gym session.
Signs of Success and When to Worry
Monitoring your plant for signs of stress is part of the process. A slight droop for the first twenty-four hours is normal and is usually just the plant reacting to the change in environment. However, if the wilting persists for several days despite the soil being moist, it is a sign that the roots are not functioning correctly. In such cases, increasing the humidity around the plant – perhaps by using a pebble tray or a humidifier – can help by slowing down the rate of moisture loss from the foliage.
Watch for new growth: The appearance of a new leaf or a fresh green tip is the ultimate sign that the plant has successfully navigated the move.
Monitor the soil: Fresh soil holds water differently than old, depleted soil. Use your finger to check the moisture level two inches down rather than relying on your old watering schedule.
Check the color: If the leaves begin to turn yellow from the bottom up, it might be a sign of overwatering in the new, larger volume of soil.
Advanced Techniques for Sensitive Species
Some plants, like the Ficus Lyrata or certain Calatheas, are notorious for their dramatic reactions to being moved. For these sensitive souls, you might consider using a “root stimulant” or a seaweed-based solution during the first watering. These organic amendments contain hormones that encourage root branching and reduce the physiological impact of stress. Another trick is to perform a “slip-potting” where you move the entire root ball into a larger pot without touching the roots at all, simply filling the gap with new soil. This is the safest way to provide more room with zero risk of shock.
In the long run, re-potting is a vital part of plant health that replenishes minerals and provides the physical space needed for a plant to reach its full potential. When done with a gentle hand and a thoughtful mind, it becomes a rewarding experience that strengthens the bond between the gardener and the garden. It is a moment of renewal, a fresh start in a clean home, and with the right techniques, your plants will not only survive the move but will flourish with newfound vigor.