Root rot is often described as the silent killer of the indoor plant world. It is the nightmare that every plant enthusiast fears, not just because it destroys a plant from the inside out, but because most of its symptoms only become visible when the damage is already severe. Imagine nurturing your favorite fiddle leaf fig for months, only to see the leaves suddenly wilt and turn a sickly yellow. Your first instinct might be to give it more water, thinking it is thirsty. In reality, you are just pouring fuel on a fire that is already devouring the roots. Understanding root rot is not just about identifying a problem; it is about understanding the delicate biology of soil, the balance of oxygen, and the hidden life of microscopic fungi.
In this comprehensive guide, we are going to demystify root rot once and for all. We will explain exactly why this disease takes hold, how to spot the warning signs before it is too late, and the surgical steps you must take to save your botanical investments. Mastering this knowledge will transform you from a casual plant owner into a skilled indoor environmentalist who truly understands the life happening beneath the dirt.
Part One: What Exactly is Root Rot and How Does It Start?
From a scientific perspective, root rot is a lethal combination of oxygen deprivation and the activity of opportunistic fungal pathogens like Pythium and Phytophthora. In a healthy environment, plant roots need to breathe just as much as the leaves do. Quality soil contains tiny air pockets that allow for gas exchange. When you overwater a plant, or when you use a heavy soil mix that does not drain well, these air pockets fill with liquid instead of oxygen.
This is where the suffocation begins. In this anaerobic or oxygen free environment, the root cells begin to die and decompose. This decay becomes a feast for the fungi present in the soil. Under normal circumstances, these fungi are relatively harmless, but they pounce on weakened, dying roots. Once the fungus invades the plant’s vascular system, the rot spreads upward, effectively cutting off the plumbing that delivers water and nutrients to the stems and leaves. This is why a plant looks wilted even when the soil is soaking wet; the roots have simply stopped functioning as a straw for life.
Part Two: Identifying the Early Warning Signs
The most frustrating part of root rot is that the actual infection is buried underground. Therefore, we must rely on the external signals the plant sends through its foliage. The first red flag is often a sudden yellowing of the lower leaves. This yellowing is different from the yellowing of a thirsty plant. In a rot case, the leaves will feel soft, pale, and almost translucent, whereas a thirsty leaf will be dry, brittle, and crunchy.
Another major sign is unexplained wilting. If your plant looks limp in the morning despite the soil being moist, that is a loud alarm bell. You should also look at the base of the stem right at the soil line. If you notice a brown or black discoloration, or if the stem feels mushy when you give it a gentle squeeze, the rot has already reached the main tissues. However, the only way to get a definitive diagnosis is to slide the plant out of its pot and inspect the roots manually. Healthy roots should be firm and white or tan. Rotting roots are dark brown or black, slimy to the touch, and will literally fall apart when you tug on them. They often emit a foul odor similar to a swamp or rotting vegetables.
Part Three: The True Culprits Behind the Catastrophe
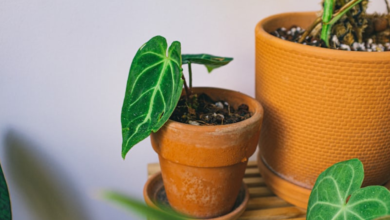
Many people assume that overwatering is the only cause, but the truth is a bit more nuanced. Overwatering is the trigger, but several factors make a plant vulnerable to that trigger. The first is the wrong container. A pot that lacks drainage holes is essentially a death sentence. Water pools at the bottom, turning the soil into a stagnant pond where no oxygen can survive.
Secondly, the type of soil you use plays a massive role. Garden soil meant for the outdoors is often way too heavy for indoor use and lacks aeration components like perlite. Thirdly, the size of the pot matters more than you might think. If you put a small plant in a massive pot, the large volume of soil will hold onto far more water than the plant can possibly drink, keeping the roots in a permanent state of wetness. Finally, cold temperatures in the winter reduce the plant’s metabolism and the rate of evaporation. If a gardener continues to water at the same frequency used in the summer, the chance of rot increases dramatically.
Diagnostic and Treatment Action Plans
To make the recovery process easier to manage, use these lists to organize your rescue efforts systematically.
Primary Factors Leading to Root Rot:
Watering Without Checking: Pouring water into a pot before the top layer of soil has had a chance to dry out.
Decorative Pots Without Holes: Using aesthetic planters that trap water at the bottom without an exit strategy.
Old or Contaminated Soil: Reusing soil that may already harbor active fungal spores from a previous plant.
Over Fertilizing: Excess salts from fertilizers can chemically burn root tips, creating easy entry points for fungi.
Surgical Steps for Treating an Infected Plant:
Extract and Clean: Gently remove the plant from its pot and wash away every bit of old soil under lukewarm running water.
Surgical Pruning: Use a pair of sterilized shears to snip away every black or slimy root, making sure you only leave the firm white roots behind.
The Peroxide Rinse: Dip the remaining healthy roots in a solution of water and three percent hydrogen peroxide to kill lingering fungi and provide a quick oxygen boost.
Repotting for Success: Use a clean, sterilized pot and entirely fresh soil with a high percentage of perlite to ensure maximum aeration in the future.
Part Four: The Road to Recovery and Sustainable Prevention
After you have performed the root surgery, the plant enters a period known as transplant shock. During this phase, it is extremely vulnerable because it has lost a large portion of its support system. The secret here is balance. Do not put the plant in direct sun immediately, as the leaves will evaporate more water than the remaining roots can provide. Place it in a warm spot with bright, indirect light instead.
It is also vital to reduce the leaf mass of the plant. If you had to cut away fifty percent of the roots, you should consider pruning back about thirty to fifty percent of the leaves. This might feel painful, but it is necessary. Reducing the foliage lightens the workload for the stressed roots and allows the plant to focus its energy on rebuilding its base rather than trying to feed a large canopy. Sustainable prevention starts with a change in your watering philosophy. Learn to touch the soil and reach down two inches. If you feel any moisture at all, wait another day. Most houseplants are far more forgiving of being forgotten for a few days than they are of being drowned.
Managing root rot is a masterclass in patience and precision. It teaches you that what happens below the surface is just as important as the beauty you see above. By providing well aerated soil, pots with excellent drainage, and following the rule of drying out between waterings, you can build a fortress that protects your plants from this deadly disease. Remember that the root is the heart of the plant; if the heart is strong, the leaves and stems will follow with vigor and beauty.